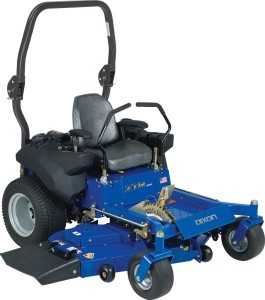
 Small adjustments and regular maintenance can help a Dixon Z-Drive transaxle system enjoy a long and useful life. Many of these adjustments are actually very quick and easy to execute, especially once the system has been removed from the power equipment in question and the steps needed for disassembly have been followed carefully. From roller adjustment to discup alignment, here’s a look at the easiest and most effective methods of maintenance for the Dixon Z-Drive transaxle system in any Dixon mower.
Get the Right Tools for the Job
Before beginning any maintenance work on the Dixon Z-Drive system, equipment owners should make sure that they have the right tools on hand to get work done quickly and easily. The right tools will also help guard against accidental and expensive damage to certain parts or fixtures that hold the Z-Drive together and guarantee its efficient operation. The tools required for most regular maintenance and adjustment procedures include:
– Combination wrenches measuring 3/4″, 7/16″, 9/16″, and 11/16″
– A 7/32″ allen wrench
– An adjustment gauge
– A 0.050″ feeler gauge
Discup Alignment, Roller Adjustment, and Roller Plate Adjustment
Because both the discup hardware and the rollers and roller plates are housed within the same area, adjustment to all three pieces of hardware can be completed at the same time by following a few simple steps.
Step 1: Remove Neutral Springs
Use the 9/16″ combination wrench to loosen and remove both the top and bottom neutral springs holding the Z-Drive system together. A 7/16″ combination wrench will be needed to loosen the corresponding lock nut holding each spring in place. Furthermore, a 3/4″ combination wrench will be required to loosen the jam nuts that also hold these springs into place. With the springs loosened and both the lock nuts and jam nuts removed, slide the springs away from the Z-Drive and remove them.
Step 2: Check and Adjust Roller Plate Alignment
Use the adjustment gauge recommended in the parts list to judge whether or not the roller plates are perpendicular to the Z-Drive’s base. If they are, they can be left alone. If not, a 9/16″ combination wrench can be used to change the position of the roller plate.
Step 3: Check and Adjust Discups
The same alignment gauge can be used to check whether or not the discups are perpendicular to the back edge of the Z-Drive’s center section. Again, a 9/16″ combination wrench should be used to adjust this position if required.
Step 4: Check and Adjust the Rollers
The alignment gauge can be bolted to the front of the cradle assembly, allowing for adjustment and calibration of the rollers themselves. Once bolted into place, pull each of the roller assemblies inward and check the gap between them and the roller plate. This gap should measure 0.050 inches. If not, adjustments should be made with an 11/16″ combination wrench before continuing.
Adjustment of the Pre-Load Mechanism and the Rubber Spring Assembly
Step 1: Get the Rubber Spring Assembly into Place
The rubber spring assembly is the key element used for adjustment and calibration of the pre-load mechanism. To adjust this key part, push the rubber spring assembly in and ensure that the rod end is perpendicular to the L-Rod. Next, turn the rubber spring mount clockwise until the lower spring is firmly against the Z-Drive’s cradle.
Step 2: Set the Pre-Load
The pre-load can be set by tightening the jam nut against the rubber spring that was adjusted in the first step of this process. When it has been set into place properly, the corresponding 3/4″ jam nut can be tightened to safeguard against unwanted movement or a loss of precision.
Adjusting the Discups to be Centered on the Cones
Adjusting the discups so that they are aligned at the center of the Z-Drive’s cones is relatively easy. The system must be held in a cradle height gauge, which can be used to make adjustments and determine how to position the discups over the cones. When in place, two jam nuts can be tightened until a bolt can be screwed into the cradle housing. This will allow for free movement of the drive cones, which should be turned slowly until they are fully centered and aligned with the discups.
DixonZTRParts.com is a Great Resource for Dixon Parts and Assistance
For decades, Dixon ZTR Parts has been an authorized Dixon retailer and is able to provide OEM replacement parts that will keep the Z-Drive transaxle system in good repair for decades after the initial purchase. Because the company offers a wealth of support resources, technical guides, and high-quality parts straight from Dixon’s own warehouses, it represents a great asset for both new and seasoned Dixon mower owners and Dixon Z-Drive transaxle buyers.
