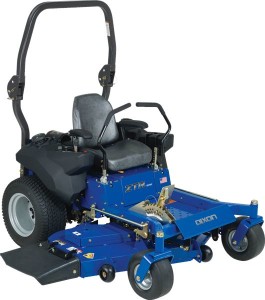
 Replacement of the Dixon Z-Drive transaxle system’s drive cones and discups can be a pretty time-consuming process, even for those equipment owners who are familiar with the tools, parts, and steps necessary to complete the procedure in the quickest possible way. For those new to the system, though, these steps are worth reviewing before completing a full removal and replacement of either part within the Z-Drive. Here’s a look at how to do just that.
Drive Cone Replacement: Tools, Time Required, and Disassembly
A successful drive cone replacement procedure will require the owner to have several tools available throughout the process, including all of the following:
– A 15/16″ socket
– A 15/16″ combination wrench
– Ratchet
– Torque wrench
– Hammer and punch
– Bearing puller
– Loctite Anti-Seize
Step 1: Remove the Top Nut and Bearings
To get the process started, using a 15/16″ socket, remove the top nut from the system that holds the drive cones into place. Next, remove the upper and lower bearings that hold the cone frame in place. Inspect these bearings for wear and tear after they have been removed. If you find that you need to replace bearings, contact www.dixonztrparts.com for all your OEM replacement parts.
Step 2: Perform an Inspection of Parts
Now, take a brief moment to inspect the Z-Drive system’s drive cones for any dirt, debris, or wear, which might negatively affect their overall operation and efficiency. Also inspect the shaft, key, and key ways, for similar damage.
Step 2: Replace Parts Deemed Unsatisfactory
Replace any drive cones or other parts that have shown an excess amount of damage, debris, or wear, during the prior inspection phase. Ensure that all parts are secured into place.
Step 3: Reassemble the Drive Cone System
With new parts installed, reassemble the drive cone system by placing the upper and lower bearings into place and securing them appropriately. Use the Loctite Anti-Seize recommended earlier to coat the shaft of the drive cone system. Install the drive pulley and reassemble the cone drive assembly. Slide the cone drive assembly into the cone shaft, slide the spacer into the shaft, and install the upper cone system and key. The process is now complete. The process should take about 45 minutes from start to finish.
Discup Replacement: A Quick Look at the Process
The discup replacement process is significantly quicker than replacement of drive cones, and Dixon estimates that this procedure will take about 23 minutes per discup. Be sure to have the following tools available:
– Loctite Anti-Seize
– 15/16″ wrench or socket
– Torque wrench
– 1/2″ wrench or socket
– Bench vise
Step 1: Secure the Equipment and Remove Lock Nut
To make working on the discup disassembly a bit easier, place the entire assembly into a bench vice while working. Once the assembly is secure, go ahead and use a 15/16″ wrench or socket to remove the discup lock nut. A 1/2″ wrench or socket can optionally be used to remove the set bolt, which is only present on select models.
Step 2: Work with the Discup Bearings
Slide the shaft out of the discup assembly and then remove the bearings housed within that assembly. Inspect these bearings for wear and tear, as well as dust and debris that might negatively affect their operation. If necessary, replace these bearings with new ones.
Step 3: Inspect the Roller Pin, Discup, and Pivot Bolt
Inspect the roller pin to ensure that it still operates smoothly and does not have any noticeable damage or wear. The pivot bolt should also be inspected for signs of excessive wear and tear. If necessary, this bolt should be replaced. Finally, the discup itself needs to be inspected for major signs of wear, including cracks and scrapes, rough spots, significantly worn surfaces, and anything else that might negatively affect the part’s continued performance.
Step 4: Reassemble the Discup Assembly
With new parts in place and assembled, slide the shaft through the system’s inner bearing and then put the key into the discup housing to keep it in place. Next, slide the discup shaft through the outer spacer and slide the sprocket onto the shaft. Align all of the keyways and then insert the necessary key. Replace the lock nut that was removed in the first step of this procedure and then enjoy a better, more efficient discup assembly. The process is complete.
Customers Looking for Dixon Parts Should Choose Dixon ZTR Parts
Dixon ZTR Parts has a reputation for excellent product knowledge, unparalleled customer service and dependability. Working closely with the manufacturer, Dixon ZTR Parts has access to a wealth of OEM parts and numerous resources for owners that can help them execute great maintenance and skilled repairs no matter the problem that ails their equipment.
