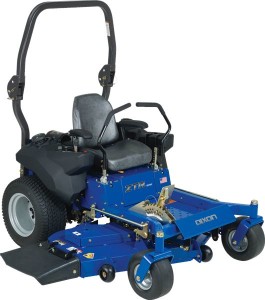
 Like any power equipment drive system, the Dixon Z-Drive transaxle occasionally requires maintenance or repairs that include the removal, disassembly, and reassembly of the entire system. For those who are not experienced with Dixon products or the Z-Drive system specifically, performing any of these tasks for the first time can be a bit challenging. With the right stools and a solid plan in place, however, maintenance and repairs can be made far more approachable and less stressful overall.
Removing the Dixon Z-Drive Transaxle
To get started with the removal of the Dixon Z-Drive transaxle system, owners will need to make sure that they have the right tools on hand for each step of the process. This includes several combination wrenches and other, smaller tools that are instrumental in removing the transaxle. Among the required tools:
– Combination wrenches measuring 7/16″, 9/16″, 3/4″, and 11.16″
– A 9/16″ socket
– A shop hammer
– A 12″ socket extension attachment
– A ratchet drive
– One mechanic’s punch
– Needle nose pliers
Remember to always take proper safety precautions before performing any maintenance on the Z-Drive system, including removing the ground wire from the equipment’s battery to guard against unwanted shocks and surges that might damage the equipment and injure the person doing the work.
A Look at the Proper Steps to Take During Removal
The drive belt assembly must be completely removed from the equipment, and the top drive pulley must be removed so that the transaxle assembly can be more easily removed. Both the seat assembly and several components within the equipment’s brake shaft must also be removed to clear the way for full removal of the Dixon Z-Drive transaxle system. This process is covered extensively, through a ten-step process, in the Z-Drive system’s owner’s manual.
Disassemble the Dixon Z-Drive Transaxle
Disassembly of the Z-Drive transaxle system also requires quite a few tools for easy and effortless work, including the following:
– Combination wrench attachments measuring 3/4″, 7/16″, 9/16″, and 11/16″
– A 7/32″ allen wrench
– Needle nose pliers
Easy Steps for Full Disassembly of the Equipment
Before beginning disassembly, the Z-Drive should be mounted on a transmission plate and bolted into place so that unexpected movement does not derail the process. Next, the 7/16″ lock nuts and 3/4″ jam nuts on top of the Z-Drive assembly should be loosened. Next, the rubber spring assemblies and 11/16″ pivot bolt lock nuts should be removed and set aside for safekeeping. Cradle springs on the side of the Z-Drive system are the next pieces to be removed, and this will require use of the needle nose pliers recommended earlier.
Continue the process by removing the 7/32″ pivot bolts and the 9/16″ nuts on both the top and bottom of the Z-Drive rolling plate. A set of 9/16″ jam nuts on the underside of each neutral rod must also be removed. Those neutral assemblies should then be removed and, finally, the center cradle assemblies can be removed. This represents the end of the full Dixon Z-Drive Transaxle disassembly process.
Reassembly of the Dixon Z-Drive Transaxle System
After the necessary maintenance procedures or repairs have been made, the Dixon Z-Drive will naturally need to be reassembled for use in the company’s mowers and other power tools. This process is as simple as following the disassembly and removal processes in reverse. All of the tools mentioned in the two earlier sections of this tutorial should be on hand in order to reassemble the Z-Drive system and install it back into the equipment easily and efficiently.
It’s worth noting that a great deal of caution should be used when handling the fully reassembled Dixon Z-Drive transaxle, as any drops or sudden movements could undo repairs or cause others to be necessary. After the system has been reinstalled into the equipment, be sure to reconnect the ground wire to the battery so that the equipment’s ignition functions properly and the engine is able to start.
For any other concerns regarding the removal or disassembly of the Dixon Z-Drive, owners should always consult their owner’s manual, repair guides, or other informational resources available from Dixon and the company’s nationwide network of retailers.
Dixon ZTR Parts Has a Full Line of Z-Drive Equipment and Parts
For those homeowners and commercial equipment owners who need to complete extensive maintenance on their Dixon Z-Drive transaxle system, Dixon ZTR Parts has a large selection of OEM parts, helpful tools, and years of industry experience. The company can help customers locate the exact parts they need with its innovative online parts lookup tool, as well as providing customers with new Dixon Z-Drive transaxle systems and a wealth of maintenance documentation.
For the best combination of parts, service, and documentation, Dixon ZTR Parts is a natural choice for both residential and commercial customers.
